So I made over my bathroom...on a $100 budget!

I've made over a lot of spaces in our house on a budget including adding DIY faux garage door windows to our garage doors with nothing more than my Silhouette cutting machine and some vinyl...

And updating our laundry room on a shoestring budget....

This time...I had my sights set on the powder room. I went into this $100 bathroom makeover with this as my canvas and this as my inspiration.
 On a $100 budget there was no way I was getting a new vanity, but storage was a priority. I had to get the wipes (and gold fish?!) off the sink!
I had an entire gallon of blue paint (Woodlawn Sterling Blue) that was a screw-up color from the bedroom makeover and I knew I wanted to use it in the bathroom. (You'll start to notice how I kept my costs down by shopping my house and using what I already had on hand.) With storage and blue front and center I worked from there.
In case you need a refresher...here's what my bathroom looked like before....can you say U.G.L.Y?


I did a lot of research to find the most budget and user-friendly products - especially when it came to the bead board. At first I planned to use bead board paneling, but the price and the thought of all that exact cutting pointed me toward Martha Steward Living brand beadboard wallpaper. It got great reviews for ease of use and look. Many people who used it referred to themselves as 'beginners', which as far as wallpaper goes, I was a virgin. So, for the price - less than $25 for one 56 sq foot roll - I was sold. I have to tell you, it was very easy to put up. The biggest challenge was around the plumbing behind the toilet and sink, but with a little patience and a good exacto knife it wasn't anything this newbie couldn't handle.
The textured wallpaper does not have adhesive on it so I had to buy wallpaper paste which was another expense, but I found it at Walmart for $4.97. I also picked up a wallpaper smoothing tool and it was worth every penny at less than $2. It took me about two hours to put up the wallpaper from start to finish.
The wallpaper requires a coat of paint after it's hung, which actually helped to hide the seams between the sheets.
 |
| Gap between wallpaper sheets |
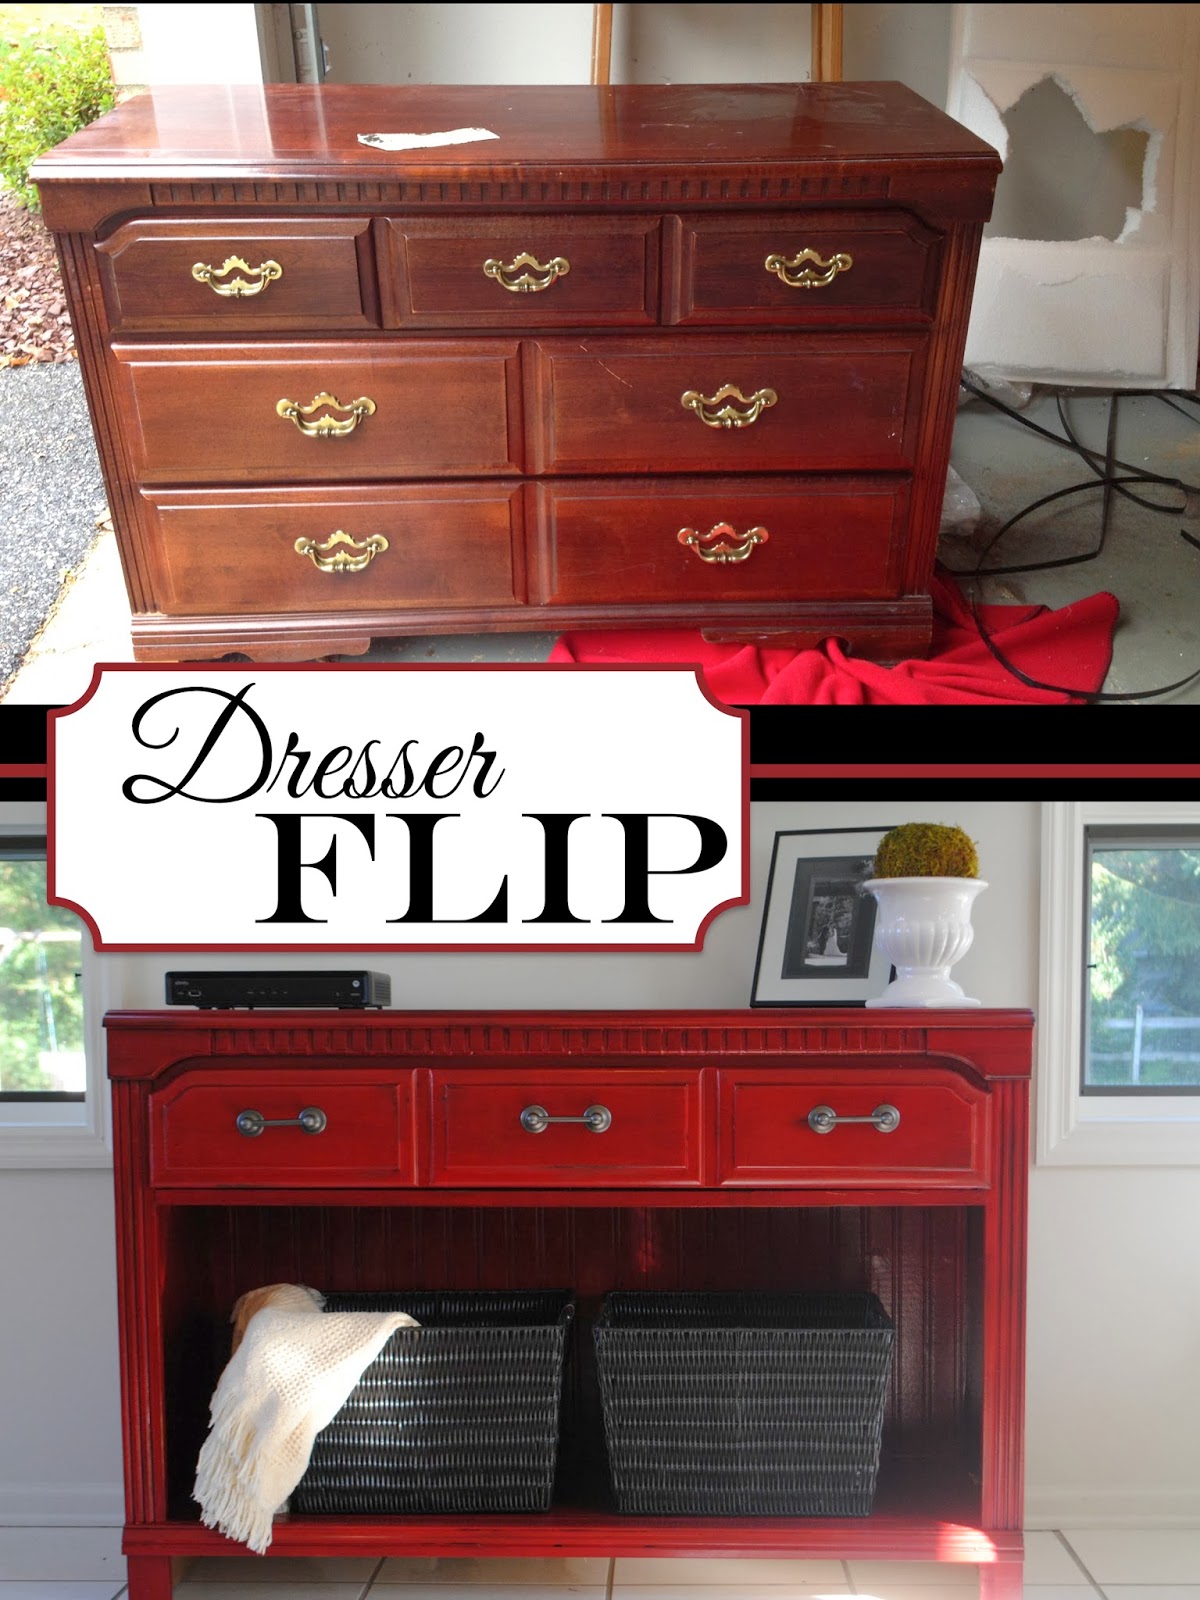
By the way - I had some of that bead board wall paper left over so I used it on a thrift store dresser to tv console makeover! Can you see it there behind the baskets?
Back to the budget bathroom makeover though....while I had the white paint out, I painted the baseboard trim. They look so fresh and clean I am just itching to paint all of the trim in the rest of my house. I had the wall/trim paint on hand from other painting projects so this didn't cost me a dime.


After the paint was on the walls and the bead board wall paper was up I turned to the details. With storage space in mind, I built the over-the-toilet hanging shelf from pallet wood (tutorial here) and stained it a dark walnut. The pallet wood cost me nothing and I already had the stain on hand.
.JPG)
I purchased the hook for $2 and the rope for about $8. I used it for both the shelf and to cover an (ugly) $1 trash can from the dollar store. So much cuter, right?!

To style the shelf I started by shopping my house first!
The basket that is holding the baby wipes (that used to teeter on the edge of the sink) I had in the top of the coat closest holding one mitten (I can't make this stuff up). The wipes container fit perfectly inside and it hides it completely!

I had originally used my home printer to print our monogram on burlap and had the frame sitting on the mantel. But I moved that onto the shelf in the bathroom instead.
The glass jar with the flowers was a small pickle jar that cleaned out and I filled with a few flowers taken from some old potpourri.

I had another small picture frame that wasn't in use, but with a quick coat of spray paint and a swatch of fabric - it added a pop of color to the shelf.

I picked up the candle for the bathroom shelf at Kohls - it was originally $24.99 (who in their right mind would pay that I have no idea...). As you can see it was on the clearance shelf and marked way down; plus I had Kohl's Cash so it didn't ding my budget at all.

Speaking of the curtains...they make this bathroom makeover for me!

I found this great HGTV Waverly fabric at Joann Fabrics. It was $19.99/yard on sale for $9.99. I only needed half a yard to bring it to $5 and I had a 15% off coupon which meant it cost me $4.25. I used a dowel, that I had on hand, for the curtain rod...yes, this, my friends, is how you keep a $100
budget when you have to re-do the bathroom from floor to ceiling.
I actually had more left over fabric which I used to make a DIY soap pump dispenser from a glass food jar. I just cut a hole in the top of the jar lid and use a soap dispenser for a bottle of soap that was long empty. If the straw's too long..just snip it! By the way that fabric on the front of the soap dispenser...I cut that fabric with my Silhouette cutting machine. Interested in 800+ Silhouette tutorials? Be sure to check out my flagship blog Silhouette School!

I had originally gone all DIY on the light switch turning it into a paper covered light switch covers...but I changed courses before I was even done the bathroom makeover. I just wasn't feeling it for this room. For the kids' rooms, yes...but this powder room - eh.

I think my favorite upgrade in the bathroom is the light fixture. I hated the brown globes that were on there - they were so dated and dark. I swapped them out for three mason jars which cost me a total of $3.87 for my newly improved DIY mason jar light fixture. They make a huge difference and for very little cost. Even my two year old son pointed them out as he peed all over my freshly wallpapered walls.


One of the last things I did in the bathroom was the trim. I have never put up or cut chair rail -- or any type of trim -- so this was definitely the biggest challenge I faced. In fact, at one point I nearly gave up - even telling my husband this was too advanced for me and I would need to hire a contractor to fix my screw ups.
I had cut all the trim the proper angles, but the corners weren't meeting up. Caulk can save a project, but this was too far gone. After stepping away for a few hours I searched YouTube for how to cut chair rail using a miter box saw and realized while I was cutting the angles correctly, I was positioning the wood improperly on the saw.

Once I fixed this I re cut every piece and it worked perfectly. The trim cost me $26.47 for 3 6-7' pieces. Having to re-buy all of it - or even part of it - would blow my budget. I decided I would scrap together what I could which meant each wall has a spot where two pieces come together in the middle of the wall. No, it's not ideal, but I am happy enough with the way it came out for my first trim project that I don't feel the need to have a pro fix my mistake.

Perhaps my biggest design challenge in the bathroom was the mirror. Okay, so it has a beveled edge...eh...it's still builders grade and it still isn't really what I want. I purchased a dark wood framed mirror from the craft store for about $24, but being right next to the dark shelf I just kept thinking it was too much wood. Once I had the bathroom all together I realized that the oval mirror isn't all that bad. So for now I have decided to keep it until I find something that I absolutely love. And I still have room in my budget to get it....

Here's how this bathroom makeover broke down:
| Renovation | Price |
| Martha Stewart Beadboard wallpaper | 24.95 |
| Rope for Shelf | 8.81 |
| Wallpaper paste | 4.97 |
| Trim | 26.47 |
| 3 mason jars for light fixture | 3.87 |
| Pallet Board | 0.00 |
| Hook for shelf | 2.97 |
| Curtain fabric | 4.25 |
| Mirror | 0.00 |
| Waste basket | 1.00 |
| Soap dispenser | 1.97 |
| Finishing nails | 1.30 |
| Candle for shelf | 3.85 |
| TOTAL | $84.41 |
And here are a few more 'after' pictures


What inexpensive ways have you found to upgrade your bath or powder room? Send me an email or post a comment below...I'm always looking for creative ways to add pizazz to the pot.


